To connect Beats Solo3 to your MacBook, open the lid of the headphones, press and hold the power button until the indicator light blinks. Then, on your MacBook, navigate to the Bluetooth settings and select your Beats Solo3 to pair.
Experiencing music with high-quality headphones like Beats Solo3 transforms your auditory journey, especially when combined with the convenience of your MacBook. Pairing these devices is a smooth process that immerses you into your playlists or podcasts with ease. Beats Solo3 offers not just exceptional sound quality but also seamless integration with Apple devices, thanks to the Apple W1 chip, which ensures quick and reliable connections.
Whether you’re settling in for a work session at a cafe or gearing up for a workout, connecting your Beats Solo3 to your MacBook can elevate the mundane to an energizing soundtrack of your life. With this guide, syncing your audio experiences across devices is just a few clicks away.
Introduction To Beats Solo3
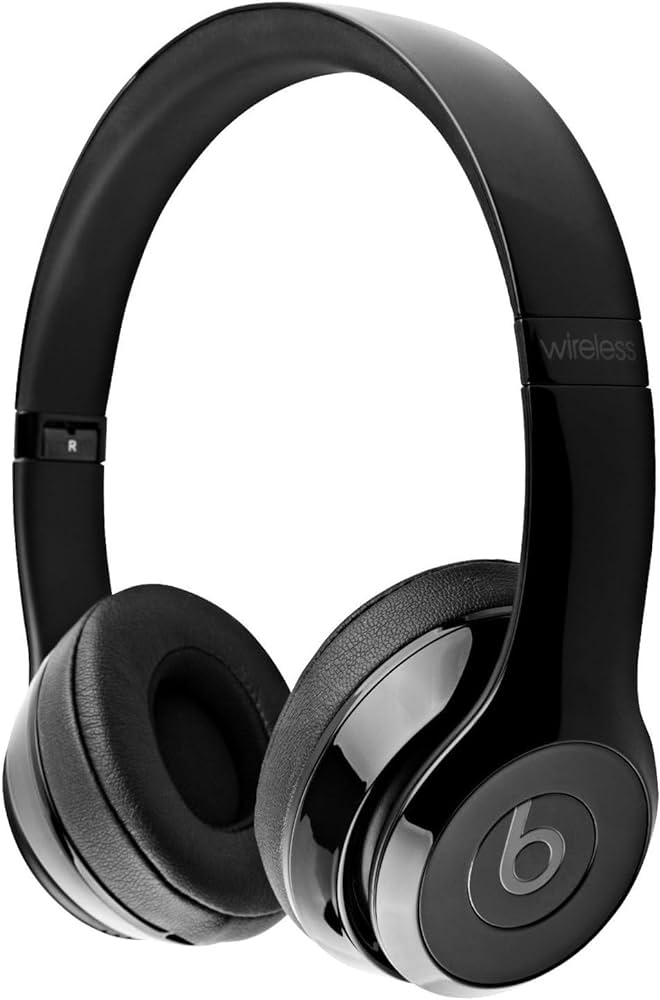
Beats Solo3 is not just a headphone; it’s a statement. It’s the perfect blend of style, comfort, and audio quality. With its sleek design and impressive sound, Beats Solo3 has become the go-to wireless headphone for music lovers around the world. Whether you’re working out or chilling out, these headphones deliver an unparalleled wireless experience.
Revolution Of Wireless Headphones
Gone are the days of tangled wires and limited movement. The introduction of Beats Solo3 marked a significant change in how we listen to music. With the freedom to move and groove without restriction, wireless headphones have changed the game.
Unmatched Convenience: Say goodbye to untangling wires.
Enhanced Mobility: Move freely with your music.
Easy Connectivity: Pairing with devices is a breeze.
Key Features Of Beats Solo3
The Beats Solo3 isn’t just about cutting the cord. It’s packed with features designed to enrich your listening experience.
Feature
Description
Apple W1 Chip
Ensures quick pairing and a stable connection.
Battery Life
Up to 40 hours of playtime on a single charge.
Fast Fuel Charging
5 minutes charging gives 3 hours of playback.
Comfort and Fit
Adjustable fit and cushioned ear cups.
Controlled Sound
Balanced acoustics and noise isolation.
On-Ear Controls
Take calls, control music, and activate Siri.
Credit: www.amazon.com
Preparing Your Beats Solo3 For Pairing
Welcome to the essential guide on preparing your Beats Solo3 for pairing with your MacBook. Ensure a smooth and hassle-free connection by following these simple steps. We’ll walk you through the preparations for syncing your Beats Solo3 to your device, so you can enjoy your music wirelessly in no time!
Charging Your Beats Solo3
Before you start pairing, a full charge is vital. Here’s how to charge your Beats Solo3:
Find the included micro-USB cable.
Connect one end to your headphones and the other to a power source.
The LED indicator will show charging status.
A complete charge takes roughly 2 hours. When the light turns white, your Beats Solo3 is fully charged and ready to go.
Turning Beats Solo3 On
Turning on your Beats Solo3 is a breeze:
Press and hold the power button on your headphones.
Hold for about 5 seconds.
Release when the fuel gauge lights flash.
Your Beats Solo3 headphones are now powered on and ready to pair with your MacBook.
Remember, the right preparation ensures a quick and easy pairing experience. Follow these instructions, and you’ll be listening to your favorite tunes on your MacBook with your Beats Solo3 headphones in no time!
Ensuring Your Macbook Is Ready
Connecting your Beats Solo3 to a MacBook is easy. But first, make sure your MacBook is ready. This means updating the software and enabling Bluetooth. Follow these simple steps to prepare your MacBook.
Updating Macbook’s Software
Keeping your MacBook updated is crucial. It ensures compatibility with your Beats Solo3. Check for the latest macOS version as follows:
Click on the Apple menu at the screen’s top left.
Select About This Mac.
Click Software Update.
If there’s an update, click Update Now.
Wait for the installation to finish. Ensure your MacBook restarts.
Enabling Bluetooth On Macbook
Now, turn on the MacBook’s Bluetooth. This connects your Beats Solo3.
Click the Bluetooth icon in the menu bar.
If you can’t see the icon, go to System Preferences.
Choose Bluetooth.
Make sure Bluetooth is on.
Once Bluetooth is active, your MacBook can find devices. You’re now set to connect your Beats Solo3.
Step-by-step Pairing Process
Imagine listening to your favorite tunes on your Beats Solo3 without any wires holding you back. That’s possible when you connect them to your MacBook! The pairing process is simple, and in no time, you’ll enjoy wireless audio. Follow these steps to start pairing your Beats Solo3 with your MacBook quickly.
Initiating Pairing Mode On Beats Solo3
To start, make sure your Beats Solo3 headphones are close to your MacBook. Here’s how to initiate pairing mode.
Turn off your Beats Solo3 headphones by holding the power button for a few seconds.
Turn them back on by pressing and holding the power button. Wait for the indicator light.
When the indicator light flashes, your Beats Solo3 are in pairing mode.
Connecting Through Macbook’s Bluetooth Settings
With your Beats Solo3 in pairing mode, it’s time to connect them to your MacBook.
Click the Apple menu on your MacBook.
Select “System Preferences”.
Open the “Bluetooth” settings.
Find “Beats Solo3” in the list and click “Connect”.
Your Beats Solo3 headphones should now be connected to your MacBook.
Troubleshooting Common Pairing Issues
Sometimes, devices can be stubborn. If your Beats Solo3 and MacBook won’t play nice, try these tips:
Check if your Beats Solo3 are charged.
Ensure your MacBook’s Bluetooth is turned on.
Keep other Bluetooth devices away to avoid interference.
Restart your Beats Solo3 and MacBook if needed.
These quick fixes usually solve most pairing problems between your Beats Solo3 and MacBook.
Verifying Successful Connection
Connecting Beats Solo3 to your MacBook unfolds a world of crystal-clear audio. After pairing, you should check the connection. A successful link ensures seamless audio experiences during work or play. Let’s check the audio output and learn how to control playback.
Checking Audio Output
To confirm your Beats Solo3 headphones are delivering your Mac’s sounds, follow these easy steps:
Click the Apple menu on your MacBook’s top left corner.
Select System Preferences.
Choose Sound.
Tap the Output tab.
Look for Beats Solo3 in the device list.
Ensure the Beats Solo3 is selected as the main audio output.
If Beats Solo3 appears with a tick next to it, the connection is successful.
Controlling Playback Via Beats Solo3
Your Beats Solo3 headphones come with built-in controls. These let you manage music and videos directly. See the control functions below:
Play or Pause: Press the center button once.
Track Forward: Double press the center button.
Track Backward: Triple press the center button.
Volume Up/Down: Use the buttons above and below the center button.
Answer/End Calls: Press the center button once.
Control your Mac’s audio playback straight from your Beats Solo3 to stay focused on your task.
Note: If the headphones are not responding, ensure they are charged and within range of your MacBook.
Credit: www.beatsbydre.com
Maximizing Your Beats Solo3 Experience
Got a MacBook and a shiny new Beats Solo3? You’re in for an auditory treat. Unleash the full potential of your Beats Solo3 headphones by connecting them to your MacBook. No need to settle for basic settings. Dive into a world of crisp, immersive sound with these easy tweaks and tips.
Optimizing Sound Settings on Macbook
Optimizing Sound Settings On Macbook
Step into customized soundscapes with these Macbook tweaks.
Go to System Preferences – Find sound settings to start.
Select ‘Sound’ – Choose ‘Output’ to adjust your Beats Solo3.
Balance and Quality – Perfect the soundstage for your ears.
Enable EQ – Use Music app for genre-specific EQ options.
Maintaining Battery Life
Maintaining Battery Life
Keep the beats rolling with lasting battery power.
Charge Smart – Full cycles extend battery lifespan.
Sound Check – Lower volume can mean longer play time.
Regular Updates – Keep firmware fresh for optimal efficiency.
Accessory Recommendations
Accessory Recommendations
Boost your listening with the right gear.
Accessory
Function
Carrying Case
Protects headphones on the move.
Charging Adapter
Quicker power-ups, more playtime.
Audio Cable
Plug-in option for non-Bluetooth devices.
Credit: www.apple.com
Conclusion
Wrapping up, pairing your Beats Solo3 with your MacBook couldn’t be simpler. With these straightforward steps, you’re ready to enjoy high-quality audio seamlessly. Embrace wireless listening and enhance your MacBook experience today. Don’t forget to reach out for support if needed! Keep this guide handy for future reference.
Hello, I am Howard E. Glover, the CEO, and founder of soundsvia.com We Are Talk About Audio Sounds Systems like Headphones, Earbuds, Headset, and Earphones